Cooking With: Still Here Still Life 2

The idea behind this “Cooking With” series is to try and emulate the involvement of wonderful illustrators at the Plate Talks events by cooking with them virtually while they draw. With the current COVID situation, social interaction is in need now more than ever and it’s interesting to explore the idea of sharing food virtually. It’s wonderful to see how a video call can facilitate us cooking and talking together. The videos add a narrative and an opportunity for reportage drawing alongside the still life image at the end, and also provide the opportunity to cook along and ask any questions. Following the success of the first takeover of the Still Here Still Life Instagram with a IGTV cooking and drawing session, we decided to make it a monthly occurrence.
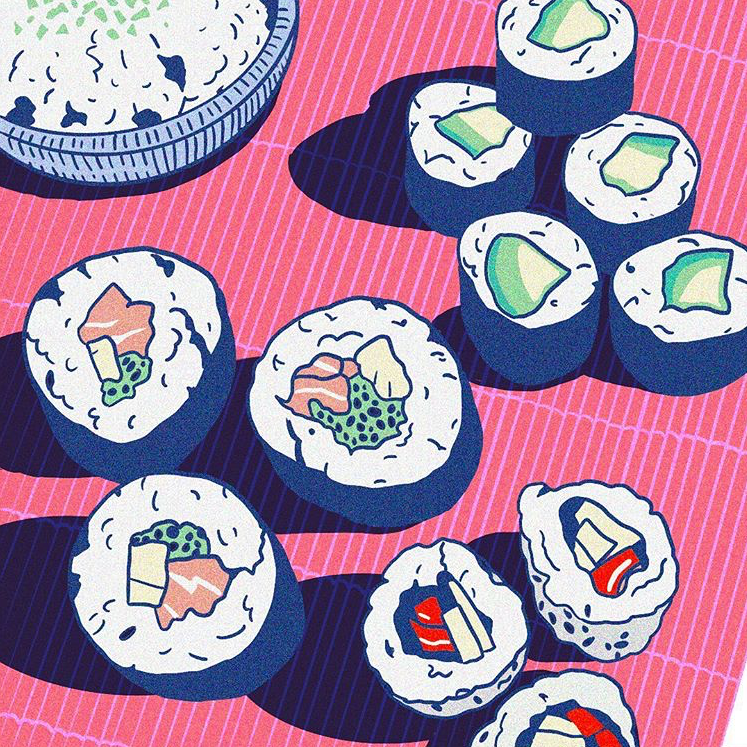
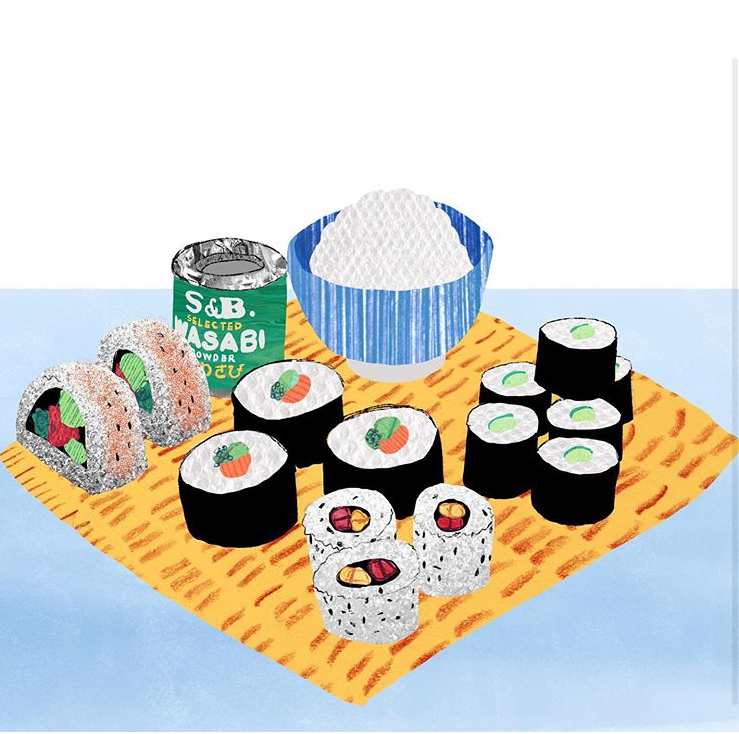
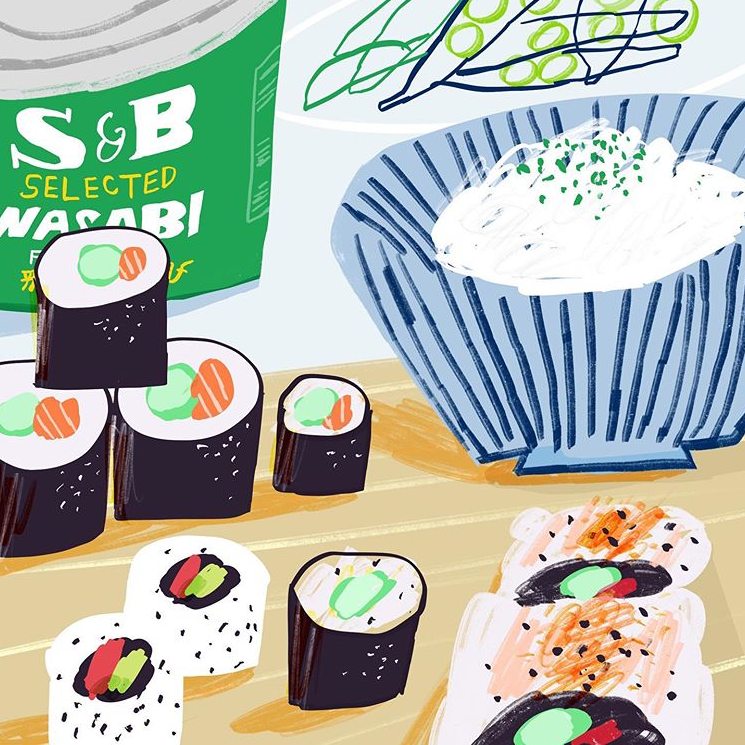
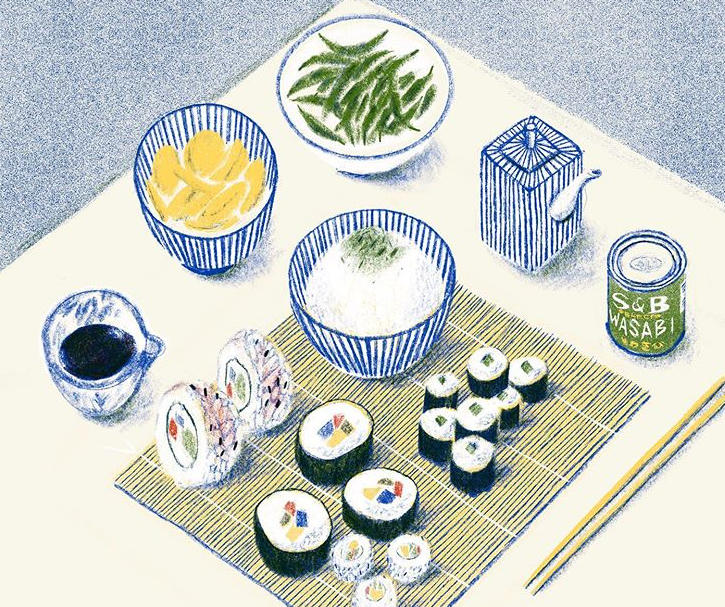
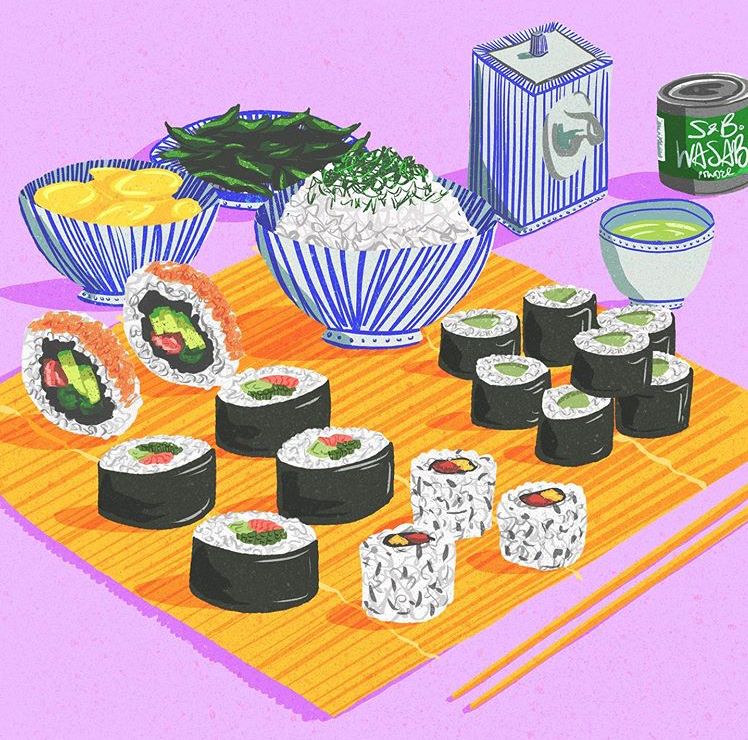
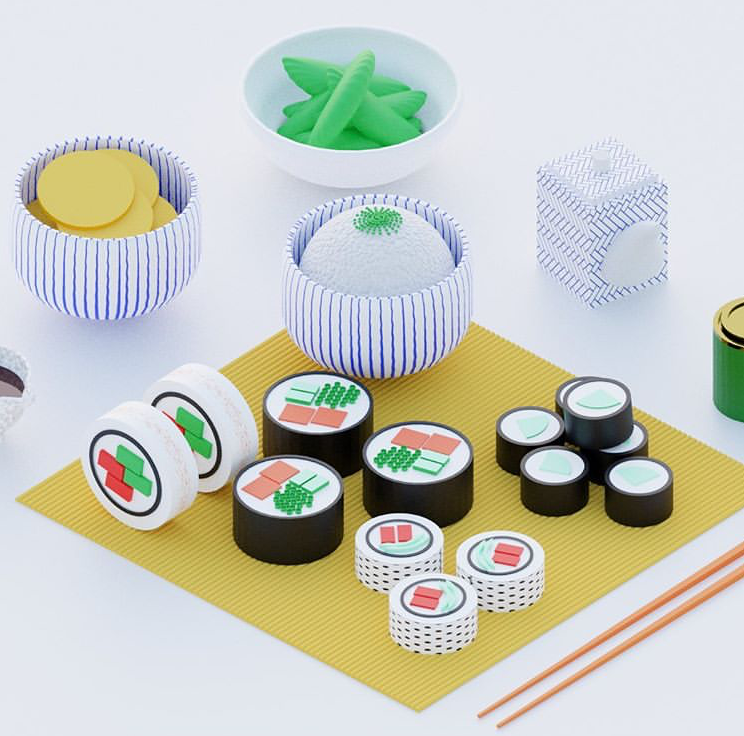
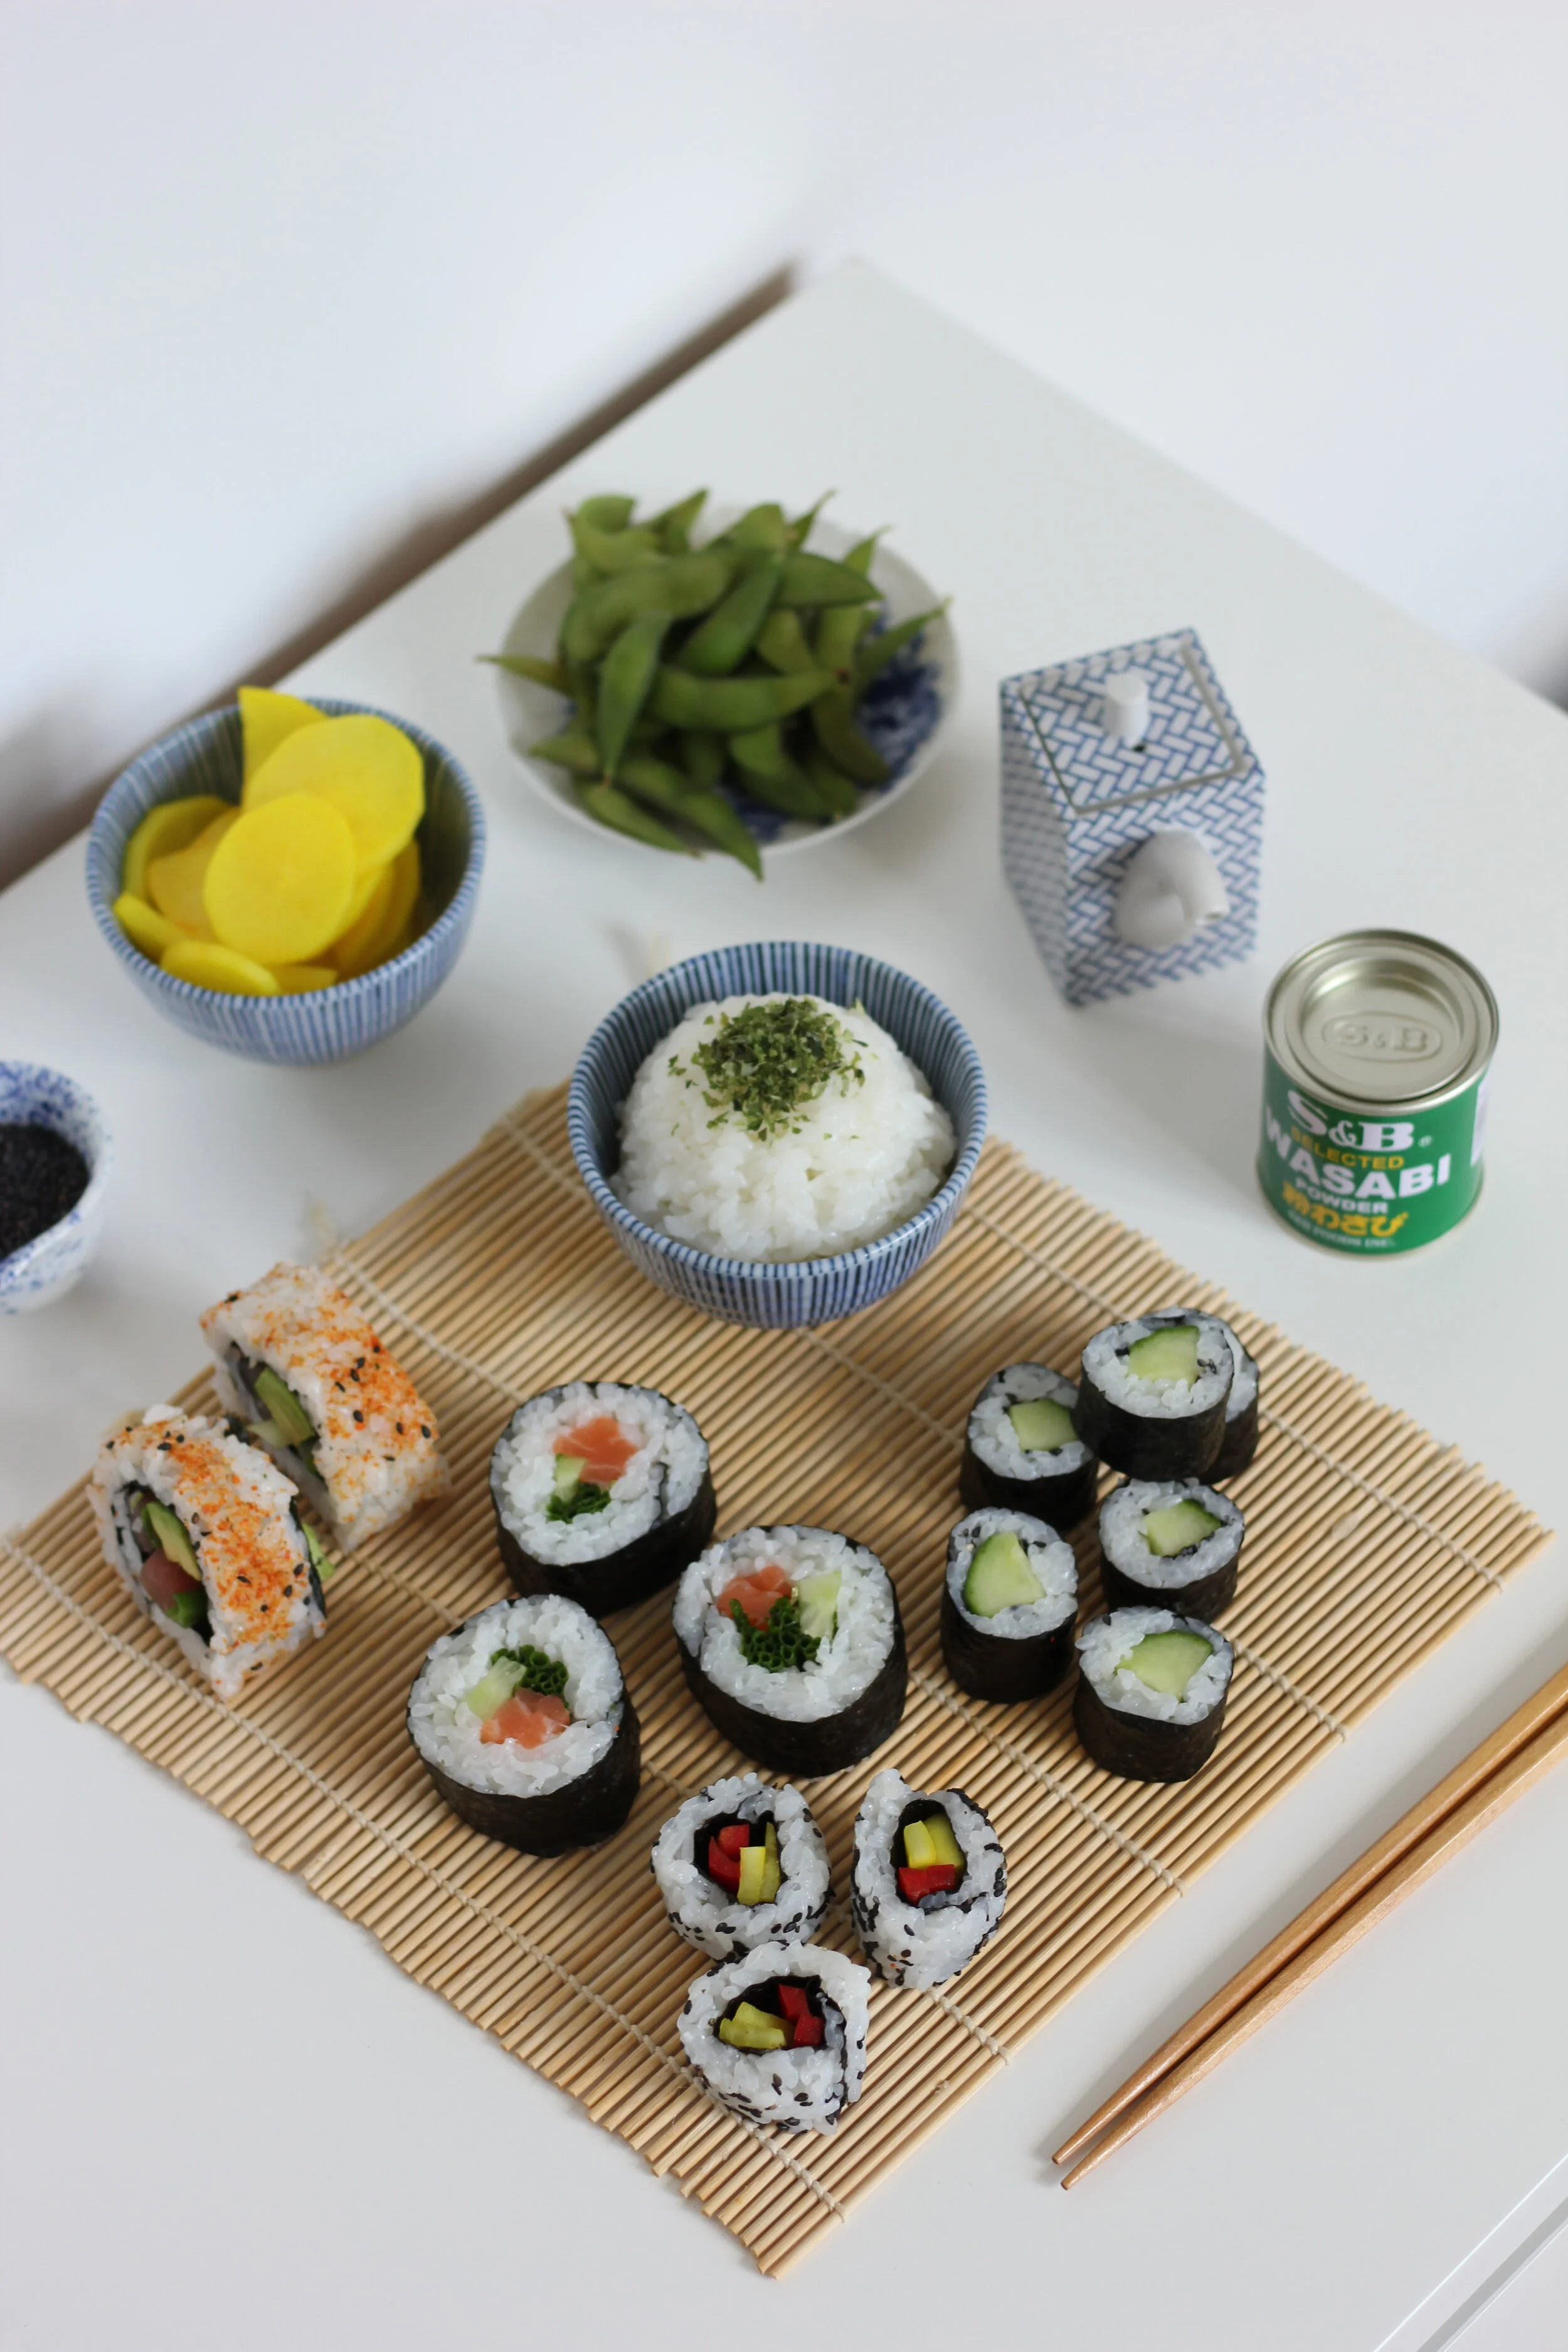
At the start of lockdown, I discovered the term “On Nomi”, which is a new Japanese term for drinking alone, together. So we took the concept a bit further by cooking and drawing alone, together. For this second edition I made four different rolls of homemade sushi: cucumber Hosomaki, Pickled Daikon and Red Pepper Ura Hosomaki, Sushi, Chive and Cucumber Futomaki and Spicy Tuna, Avocado and Spring Onion Ura Futomaki. You can see the full cooking video in the highlights on Instagram here.
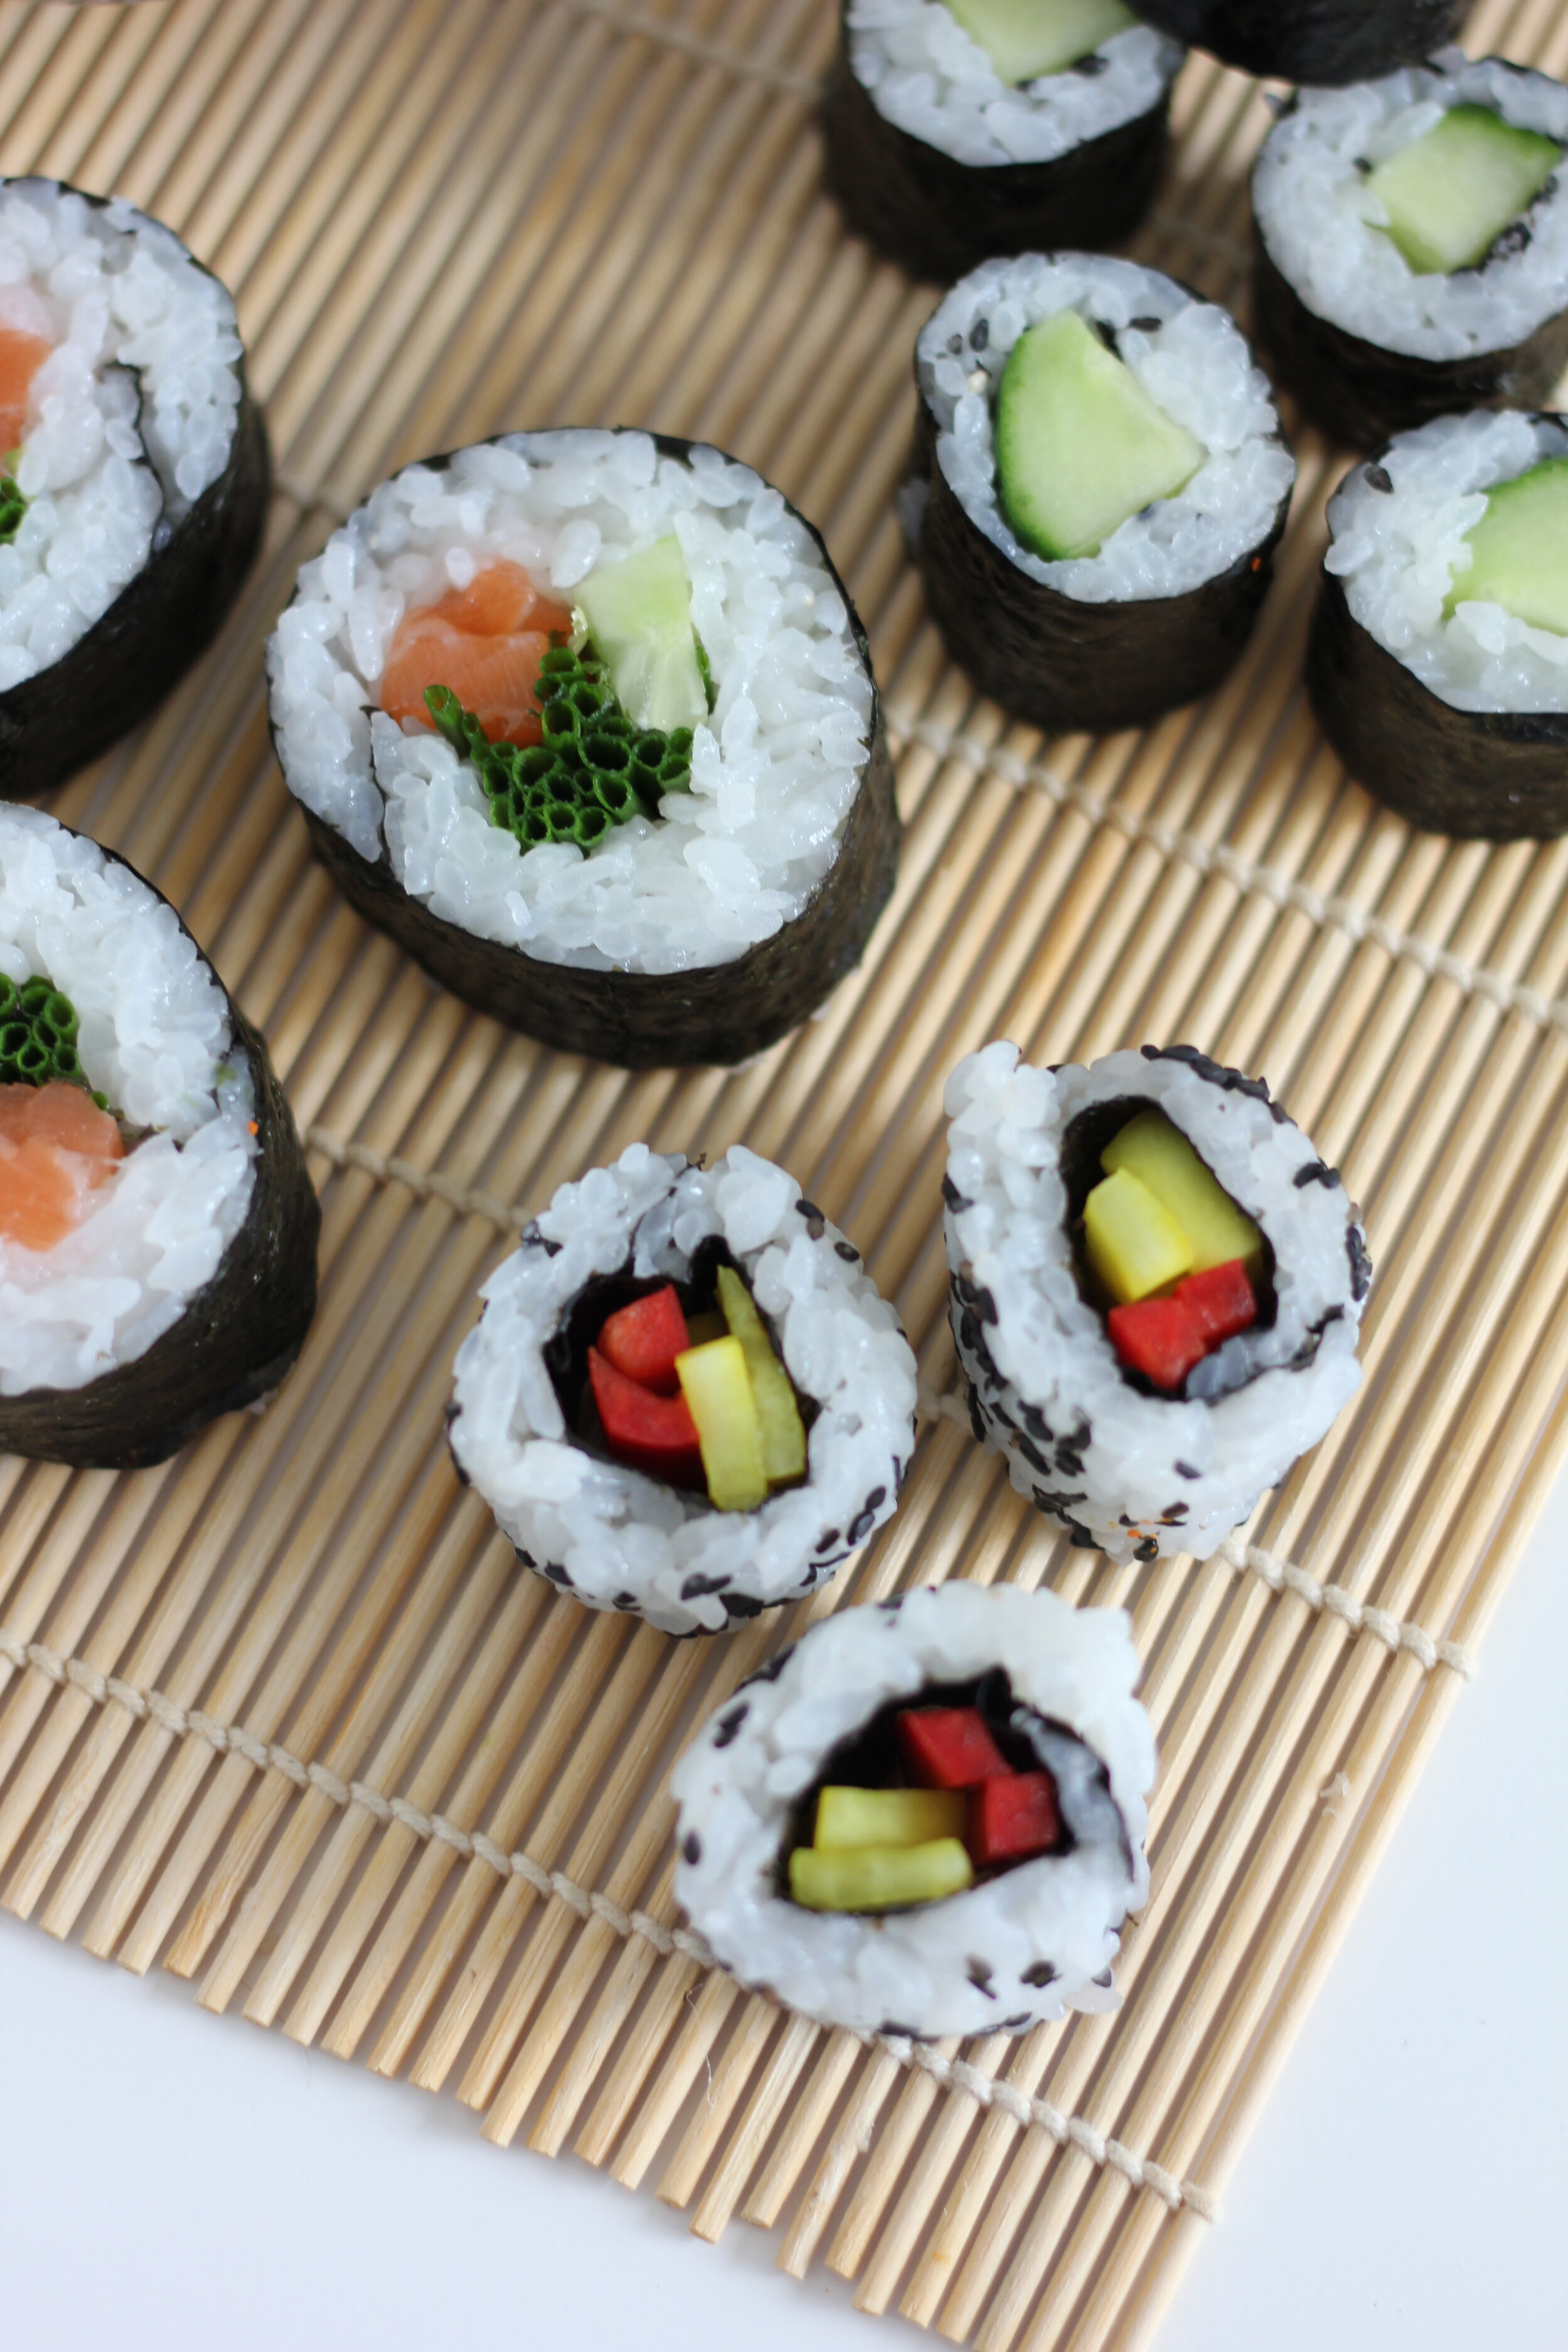
Hosomaki is a small sushi roll. In Japanese “hoso” means an object that is small, petite or slim. It is a very traditional type of sushi. Black nori seaweed on the outside and white rice on the inside with just one filling, cucumber, fresh fish or pickled daikon is traditional.
Ura Hosomaki is the same as a hosomaki but inside out, so it is a small rice roll that has the rice on the outside and seaweed on the inside. It is more traditionally eaten in Western countries, with rolls like the California roll which is crabstick, avocado and cucumber.
Futomaki is a giant roll with the nori on the outside. “Futo” means “fat”, so a whole seaweed sheet is used.
Ura Futomaki is a giant inside-out roll. My favourite sushi roll is spicy tuna, so I filled this one with tuna, avocado, spring onion with the chilli powder on the outside.
One of the many things we learnt in Japan is how important the rice quality is. As, if not more, important than the fish quality. And so this time, I’ve included the sushi rice recipe below from Yuki’s Kitchen which is, in my opinion the best sushi book out there. She also does wonderful sushi classes and presentations, so make sure to visit her website. I made the rice in advance, as it takes time to cook, add the “sushi su” (the rice vinegar mix) and cool it down. Japanese rice is short grain and sticky when cooked. The “sushi su” gives the rice more flavour and that visually glossy and sticky look. It also preserves the rice, so it can be kept for half a day / one day without putting it in the fridge. I put a damp tea towel over the rice to keep it from drying out.
Another lovely thing that I learnt from the book is the saying “Chisan, Chisho”, which means “produce locally, eat locally” so it is important to use whichever ingredients you have available to you. Of course there are traditional ingredients, but most vegetables are delicious in sushi rolls - in the past I’ve also used green beans and carrots. When we visited Japan back in April 2018, we were lucky enough to visit the Tsukiji fish market in Tokyo which was incredible. It is a bustling and busy marketplace, with so many incredibly diverse and delicious ingredients. We saw fishmongers cutting fresh tuna of unbelievable sizes. This time, my filling ingredients included: cucumber, spring onion, a romano pepper, chives, wasabi paste, daikon (a Japanese radish) which I pickled in rice vinegar and turmeric, sesame seeds, Namami Togarashi (a Japanese chilli powder), green nori sprinkle, avocado and sushi-grade raw salmon and raw tuna. Fish eggs are often used too and you can also get vegan version which is made from seaweed. It’s also nice to have pickled ginger to serve alongside in order to cleanse the palate between eating various fish.


In Hiroshima, we went to a tiny sushi restaurant and we sat at the bar watching the sushi chef make various pieces for us and those sitting next to us. The man next to me ordered an oyster. Oysters in Hiroshima are fantastic because the Seto Inland Sea nearby has the perfect conditions. Its clear and warm waters are full of the necessary nutrients for the growth of large and delicious oysters. We have never seen such a big oyster. He saw our mouths wide open, eyes sparkling with amazement at the scale of the oyster, and told the chef to cut the oyster in half so we could share it with him.
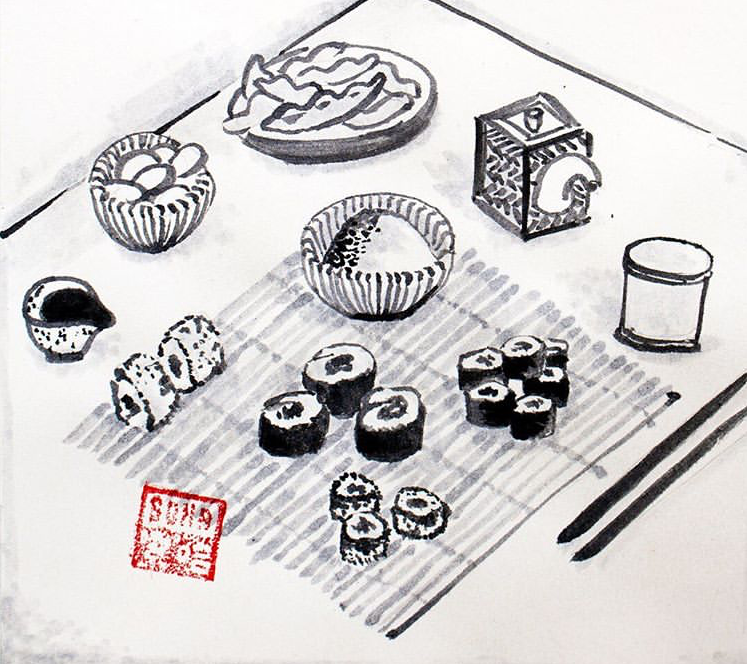
Once again we had a wonderful audience from all over the world, asking questions about our visit to Japan and discussing which other fillings would work for the sushi. The visual responses were incredible, produced in a huge array of materials and styles from painting to embroidering, paper cutting, and 3D digital modelling. @sohasavant_wrk even used Japanese Sumi-e ink and brushes and a personalised Hano Stamp. You can see more of the incredible responses on Instagram here.
The next “Cooking With” collaboration with Still Here Still Life will happen at the end of July - updates will come on Instagram so make sure you’re following Plate Talks.
Sushi Rice Recipe © Yuki’s Kitchen
Makes1.1kg rice, enough for 13 small rolls or 7 giant rolls to serve around 4 people.
Ingredients
For the sushi-su (makes 125ml):
120ml rice vinegar
3 tablespoons of sugar
1 tablespoon of sea salt
For the rice:
3 Japanese cups (450g) of Japanese rice
3 Japanese cups (540ml) of water
Method
To make the sushi-su, put the rice vinegar, sugar and salt into a pan and leave on a low heat until the sugar and salt have dissolved. Be careful not to let it boil or the flavour will spoil. Remove from the heat and leave to cool.
To make the rice, first wash it thoroughly in a sieve for 4 minutes, gently turning it over by hand until the water runs clear.
Drain the rice and put it into a pan with the water. Leave it to stand for a minimum of 30 minutes. It can be left overnight, but for the best results I recommend leaving it for 30 minutes to 1 hour.
Leaving the water in the pan, bring the rice to the boil.
Then put the lid on and reduce the heat, letting it simmer for 8-9 minutes.
Turn the heat off and let it stand with the lid on for a further 15 minutes. Do not open the lid.
Put the rice into a wider flat dish such as a sushi-oke, a baking dish or a roasting pan.
Pour the sushi-su over the rice and fold it carefully into the rice with a wooden spoon as it cools down, being careful not to damage the grains.
You can use a fan or a hairdryer on the coolest setting to speed up the cooling process, directing it at the rice.